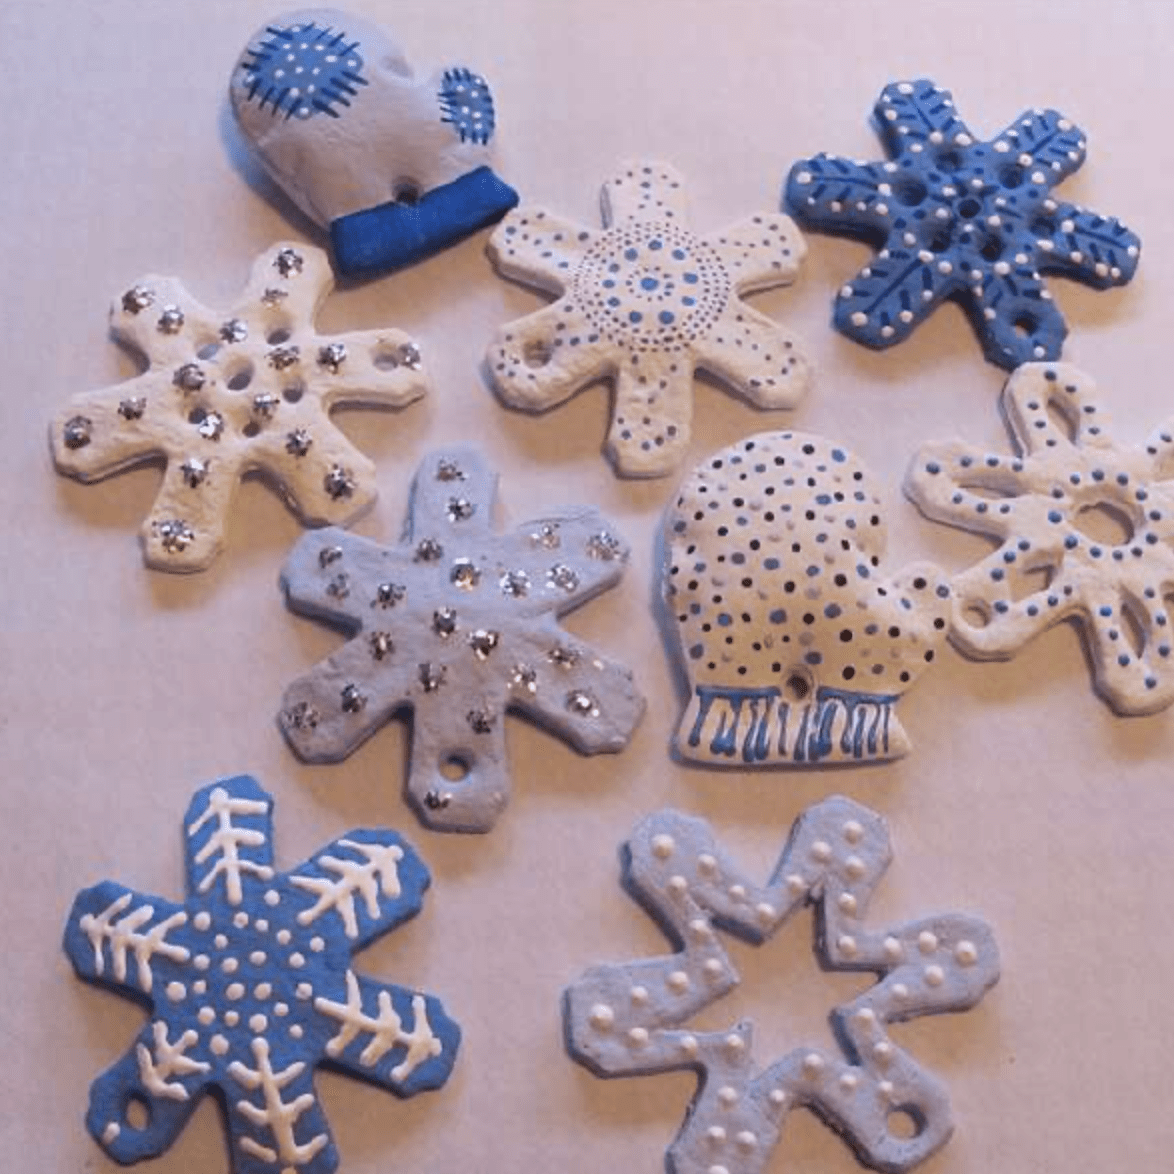
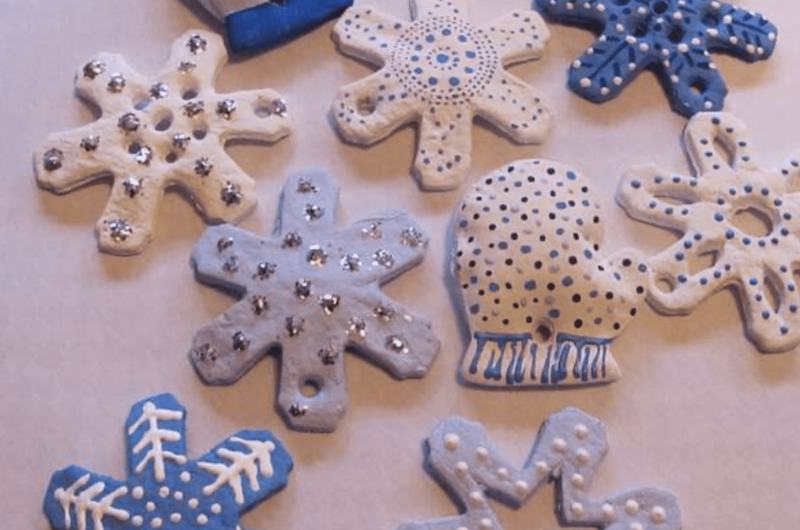
Want to create beautiful, long-lasting ornaments for the holidays or special occasions? This easy dough ornament recipe is perfect for making personalized decorations! It’s a simple, fun, and creative DIY project that requires just a few household ingredients. Whether you’re making Christmas tree ornaments, keepsakes, or fun shapes with kids, this recipe will help you craft beautiful, durable ornaments that can last for years!
Origin of the Recipe:
Dough ornaments have been a beloved tradition for centuries, dating back to European folk art. Originally, people used salt dough to create decorations for celebrations, especially during Christmas. Over time, this simple craft evolved, allowing people to make customized ornaments by adding paint, glitter, or even essential oils for a festive touch. Today, it remains a fun, budget-friendly, and creative activity for families and DIY lovers.
What We Love About This Recipe:
- Simple & Budget-Friendly: Made with just three basic kitchen ingredients!
- Customizable: You can shape, paint, and decorate them however you like.
- Long-Lasting: These ornaments can be preserved for years with proper care.
- Fun Activity for All Ages: Great for kids and adults to enjoy together!
Also Read : The Best Dry-Roasted Chickpea Recipe
The Best Dough Ornament Recipe
Course: Recipes6
servings50
minutes1
hour320
kcalIngredients
2 cups all-purpose flour
1 cup salt
3/4 cup water (adjust as needed)
Optional: 1 tablespoon cinnamon (for a nice scent)
Directions
- Mix the Dough: In a large bowl, combine flour, salt, and cinnamon (if using). Gradually add water while stirring until a dough forms.
- Knead the Dough: Knead the dough for about 5 minutes until smooth and pliable. If it’s too dry, add a little more water. If it’s too sticky, add a bit more flour.
- Roll & Cut Shapes: Roll out the dough on a floured surface to about 1/4-inch thickness. Use cookie cutters to create shapes like stars, hearts, or Christmas trees.
- Make a Hole: Use a straw or toothpick to create a small hole at the top of each ornament for hanging.
- Bake: Place the ornaments on a baking sheet lined with parchment paper. Bake at 250°F (120°C) for 2-3 hours until completely dry and hard. Let them cool.
- Decorate: Paint them with acrylic paints, add glitter, or use markers to design your ornaments. Seal with a clear varnish or Mod Podge for durability.
- Hang & Enjoy: Thread a ribbon through the hole and hang your beautiful ornaments on your tree or around the house!
Notes
- Extra Durability: Seal with Mod Podge or clear varnish to protect them from humidity.
- Air-Dry Option: If you prefer, you can let the ornaments air dry for 24-48 hours instead of baking.