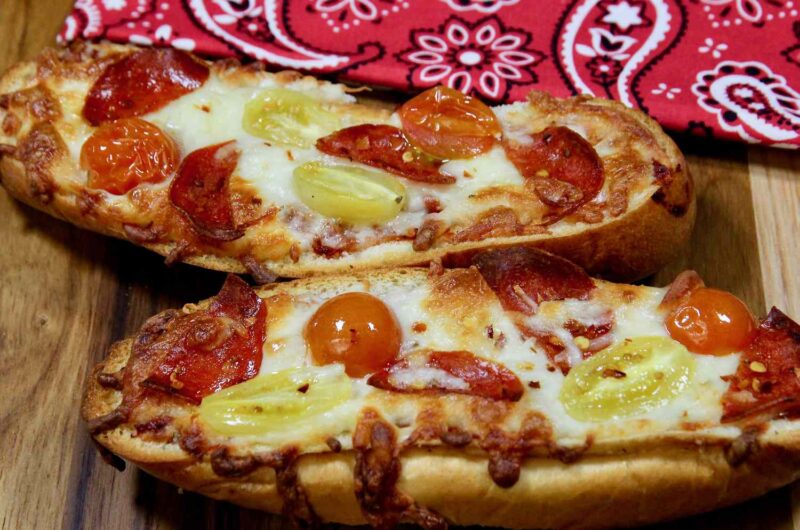
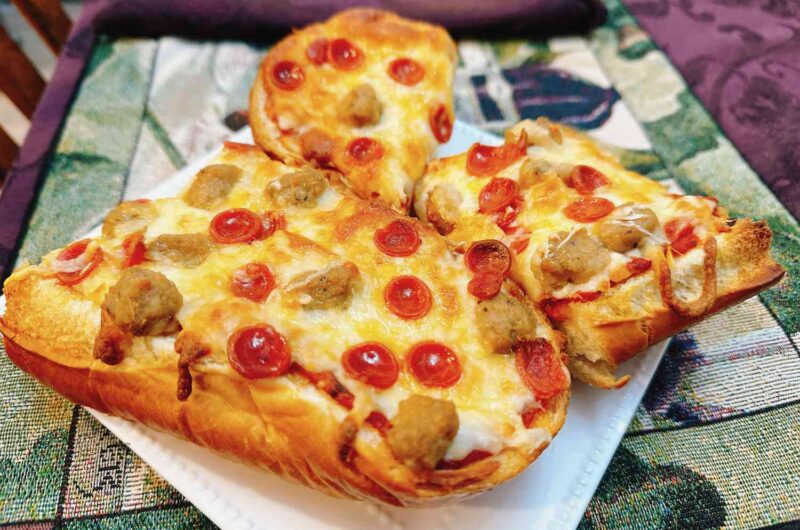
RecipeWikki Wikipedia of Awesome Taste 2025-06-07T09:41:51Z https://recipewikki.com/feed/atom/ WordPress https://recipewikki.com/wp-content/uploads/2025/04/rc.png Chef <![CDATA[Baguette Pizza]]> https://recipewikki.com/?p=7886 2025-06-07T09:41:51Z 2025-06-07T09:40:05Z Crispy, cheesy, and irresistibly fun — baguette pizza transforms a simple loaf of bread into a quick and satisfying pizza experience, perfect for casual dinners or easy snacks.

Origin Baguette Pizza

A modern twist on classic pizza, baguette pizza originated as a quick homemade alternative using crusty bread instead of traditional pizza dough — perfect for busy weeknights or impromptu gatherings.

What I Love About This Recipe

It’s fast, versatile, and endlessly customizable. You can load it with your favorite toppings, and it’s ready in minutes — perfect for when those pizza cravings hit!

Also Read : Japanese-Style Triple-Seared Steak

Baguette Pizza

Recipe by RecipeWikkiCourse: Random
Servings

15

servings
Prep time

30

minutes
Cooking time

40

minutes
Calories

550

kcal

Ingredients

  • 1 large baguette, halved lengthwise

  • ¾ cup pizza sauce

  • 1½ cups shredded mozzarella cheese

  • ½ cup pepperoni slices or cooked sausage (optional)

  • ½ cup bell peppers, mushrooms, or olives (optional)

  • 1 tbsp olive oil

  • Dried oregano or Italian seasoning, to taste

  • Fresh basil, for garnish (optional)

Directions

  • Preheat oven to 375°F (190°C). Line a baking sheet with parchment paper.
  • Brush cut sides of the baguette lightly with olive oil and place on the baking sheet.
  • Spread pizza sauce evenly over each baguette half.
  • Top with mozzarella cheese and desired toppings.
  • Sprinkle with oregano or Italian seasoning.
  • Bake for 10–12 minutes, or until cheese is melted and bubbly and baguette is crispy.
  • Garnish with fresh basil if using. Slice and serve warm.

Notes

  • For extra crispy edges, broil for an additional 1–2 minutes at the end of baking.
  • Use flavored oils (like garlic or chili oil) for an added flavor boost.
  • A great way to use up leftover veggies or meats!
]]>
Chef <![CDATA[Hidden Veggie Meatloaf]]> https://recipewikki.com/?p=7880 2025-06-07T09:38:07Z 2025-06-07T09:38:02Z A wholesome twist on the classic comfort food — this meatloaf is packed with finely grated vegetables that add moisture, nutrition, and subtle sweetness, making it perfect for picky eaters and the whole family.

Origin Hidden Veggie Meatloaf

Meatloaf is a beloved American dish, with countless variations. The “hidden veggie” version has become popular with home cooks seeking to add more vegetables to everyday meals without sacrificing flavor or texture.

What I Love About This Recipe

It’s tender, juicy, and full of flavor — and you’d never guess how many veggies are packed inside! Great for sneaking extra nutrients into a family favorite.

Also Read : Ants Climbing a Tree (Glass Noodles Stir-Fry)

Hidden Veggie Meatloaf

Recipe by RecipeWikki
Servings

6

servings
Prep time

30

minutes
Cooking time

40

minutes
Calories

350

kcal

Ingredients

  • 1½ lbs (680 g) ground beef or turkey

  • 1 small zucchini, grated

  • 1 small carrot, grated

  • 1 small bell pepper, finely chopped

  • ½ onion, finely chopped

  • 2 cloves garlic, minced

  • ¾ cup breadcrumbs

  • ½ cup milk

  • 2 eggs

  • 3 tbsp ketchup (plus extra for topping)

  • 1 tbsp Worcestershire sauce

  • 1 tsp dried oregano

  • 1 tsp salt

  • ½ tsp pepper

Directions

  • Preheat oven to 375°F (190°C). Line a loaf pan with parchment paper or lightly grease it.
  • In a large bowl, combine ground meat, grated zucchini, carrot, bell pepper, onion, and garlic.
  • Add breadcrumbs, milk, eggs, ketchup, Worcestershire sauce, oregano, salt, and pepper. Mix gently until just combined (don’t overmix).
  • Transfer mixture to the loaf pan and shape into a loaf. Spread extra ketchup on top.
  • Bake for 50–60 minutes, or until the internal temperature reaches 160°F (71°C).
  • Let rest for 10 minutes before slicing and serving.

Notes

  • Squeeze excess moisture from grated zucchini to avoid soggy meatloaf.
  • Add spinach, mushrooms, or corn for even more veggie goodness.
  • Leftovers make great sandwiches the next day!
]]>
Chef <![CDATA[Pizza Boats]]> https://recipewikki.com/?p=7874 2025-06-07T09:34:33Z 2025-06-07T09:34:03Z Fun, cheesy, and endlessly customizable — these pizza boats turn simple bread into a handheld pizza treat, perfect for quick dinners, snacks, or party appetizers.

Origin Pizza Boats

Inspired by classic pizza flavors but made even easier, pizza boats are a popular American snack that uses bread (like hoagie rolls or baguettes) as the base for melty, delicious pizza toppings.

What I Love About This Recipe

They’re fast, family-friendly, and you can personalize them with whatever toppings you love — plus they make a great way to use up leftover bread and fridge ingredients.

Also Read : Bloody Mary Pasta Salad

Pizza Boats

Recipe by RecipeWikki
Servings

6

servings
Prep time

10

minutes
Cooking time

12

minutes
Calories

300

kcal

Ingredients

  • 4 hoagie rolls or small baguettes, halved lengthwise

  • ¾ cup pizza sauce

  • 1½ cups shredded mozzarella cheese

  • ½ cup pepperoni slices or cooked sausage (optional)

  • ½ cup bell peppers, mushrooms, or olives (optional)

  • 1 tbsp olive oil

  • Dried oregano or Italian seasoning, to taste

  • Fresh basil, for garnish (optional)

Directions

  • Preheat oven to 375°F (190°C). Line a baking sheet with parchment paper.
  • Brush cut sides of bread lightly with olive oil and place on the baking sheet.
  • Spread pizza sauce evenly over each bread half.
  • Top with mozzarella cheese and desired toppings.
  • Sprinkle with oregano or Italian seasoning.
  • Bake for 10–12 minutes, or until cheese is melted and bubbly.
  • Garnish with fresh basil if using. Serve warm.

Notes

  • Use French bread or ciabatta for a sturdier base.
  • Try adding cooked chicken, bacon, or different cheeses for variety.
  • Great for kids to customize their own pizza boats!
]]>
Chef <![CDATA[Frito Pie Casserole]]> https://recipewikki.com/?p=7868 2025-06-07T09:30:58Z 2025-06-07T09:30:50Z A fun, hearty casserole inspired by the beloved Tex-Mex snack, combining chili, cheese, and crunchy Fritos for a comforting, crowd-pleasing meal.

Origin Frito Pie Casserole

Frito Pie is a popular Southwestern American dish, traditionally served by layering chili and cheese over Fritos corn chips in a bag or bowl. This casserole version makes it easy to serve and share at gatherings.

What I Love About This Recipe

It’s cheesy, spicy, crunchy, and utterly satisfying — perfect for game days, potlucks, or cozy dinners when you want big flavors with minimal fuss.

Also Read : Chicken Primavera Pasta Bake

Frito Pie Casserole

Recipe by RecipeWikki
Servings

4

servings
Prep time

30

minutes
Cooking time

40

minutes
Calories

450

kcal

Ingredients

  • 1 lb (450 g) ground beef

  • 1 small onion, chopped

  • 1 packet taco seasoning

  • 1 can (15 oz) chili beans or kidney beans, drained

  • 1 can (15 oz) diced tomatoes with green chilies

  • 2 cups shredded cheddar cheese

  • 1½ cups Fritos corn chips, crushed

  • 1 cup sour cream (optional, for serving)

  • Fresh cilantro or green onions, chopped (for garnish)

Directions

  • Preheat oven to 350°F (175°C).
  • In a large skillet, cook ground beef and onion over medium heat until beef is browned and onion is soft. Drain excess fat.
  • Stir in taco seasoning, beans, and diced tomatoes with chilies. Simmer for 5 minutes.
  • In a greased baking dish, layer half of the crushed Fritos, then half of the chili mixture, and sprinkle with half of the shredded cheese. Repeat layers.
  • Bake for 20–25 minutes until cheese is melted and bubbly.
  • Serve hot, topped with sour cream and garnished with cilantro or green onions if desired.

Notes

  • For extra heat, add chopped jalapeños or a dash of hot sauce.
  • Swap ground beef with ground turkey or plant-based meat for a lighter option.
  • Leftovers reheat well and taste even better the next day!
]]>
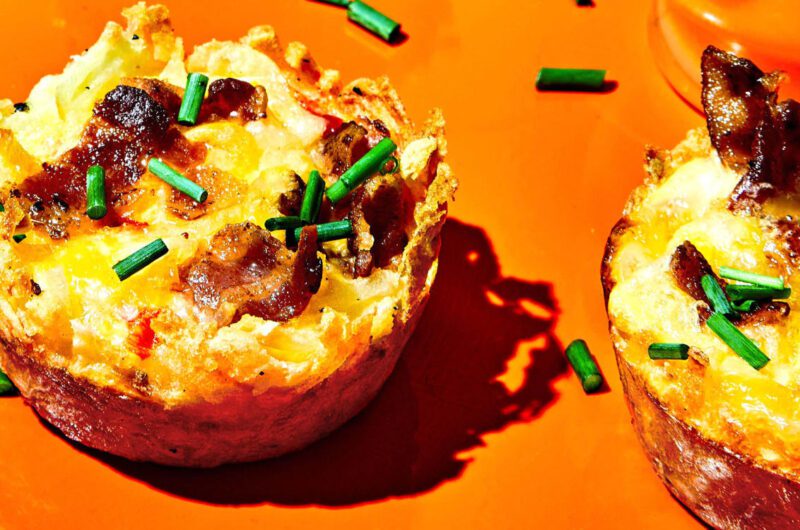
Chef <![CDATA[Hash Brown and Bacon Omelet Cups]]> https://recipewikki.com/?p=7858 2025-06-07T09:26:14Z 2025-06-07T09:05:14Z A deliciously crispy and savory breakfast treat combining golden hash browns, smoky bacon, and fluffy eggs — all baked into easy-to-serve cups!

Origin Hash Brown and Bacon Omelet Cups

Inspired by classic omelets and breakfast casseroles, these omelet cups are a convenient, handheld twist perfect for busy mornings or brunch gatherings.

What I Love About This Recipe

They’re crispy on the outside, soft and cheesy on the inside, and packed with flavor. Plus, they’re easy to customize and great for meal prep!

Also Read : Chicken Thigh and Orzo Skillet

Hash Brown and Bacon Omelet Cups

Recipe by RecipeWikkiCourse: Recipes
Servings

4

servings
Prep time

20

minutes
Cooking time

30

minutes
Calories

143

kcal

Ingredients

  • 2 cups frozen hash browns (thawed)

  • 6 slices bacon, cooked and crumbled

  • 6 large eggs

  • ½ cup shredded cheddar cheese

  • ¼ cup milk

  • ¼ cup diced bell peppers (optional)

  • Salt and pepper, to taste

  • Cooking spray or butter (for greasing muffin tin

Directions

  • Preheat oven to 375°F (190°C). Grease a 12-cup muffin tin with cooking spray or butter.
  • Press about 2 tablespoons of hash browns into the bottom and up the sides of each muffin cup to form a crust.
  • Bake hash brown cups for 15 minutes until golden and slightly crispy.
  • In a bowl, whisk eggs, milk, salt, and pepper. Stir in bacon, cheese, and bell peppers if using.
  • Remove muffin tin from oven and carefully pour the egg mixture evenly into each hash brown cup.
  • Bake for another 15–18 minutes, until eggs are fully set.
  • Let cool for a few minutes, then carefully remove cups from the tin. Serve warm.

Notes

  • Add chopped green onions or herbs for extra flavor.
  • Use turkey bacon or vegetarian bacon for a lighter or meat-free version.
  • These cups can be stored in the fridge and reheated for quick breakfasts.
]]>
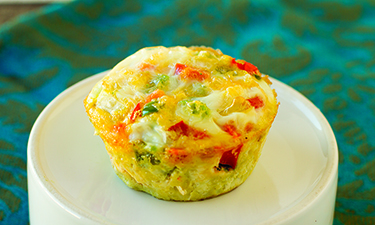
Chef <![CDATA[Scrambled Egg Muffin Cups]]> https://recipewikki.com/?p=7852 2025-06-07T09:03:13Z 2025-06-07T09:02:55Z A convenient, protein-packed breakfast that’s perfect for busy mornings! These muffin cups are customizable, easy to make ahead, and delicious served warm or cold.

Origin Scrambled Egg Muffin Cups

Egg muffins are a popular American breakfast staple inspired by classic quiches and frittatas but made in a portable, bite-sized form using a muffin tin.

What I Love About This Recipe

They’re super versatile — you can add your favorite veggies, meats, and cheeses. Plus, they’re great for meal prepping and grab-and-go breakfasts.

Also Read :Sticky Rice with Passion Fruit Sauce

Scrambled Egg Muffin Cups

Recipe by RecipeWikki
Servings

4

servings
Prep time

15

minutes
Cooking time

30

minutes
Calories

275

kcal

Ingredients

  • 6 large eggs

  • ¼ cup milk

  • ½ cup shredded cheese (cheddar, mozzarella, or your choice)

  • ½ cup diced bell peppers

  • ½ cup chopped spinach or kale

  • ¼ cup cooked bacon or sausage (optional)

  • Salt and pepper, to taste

  • Cooking spray or butter (for greasing muffin tin)

Directions

  • Preheat oven to 350°F (175°C). Grease a 12-cup muffin tin with cooking spray or butter.
  • In a large bowl, whisk together eggs, milk, salt, and pepper.
  • Stir in cheese, bell peppers, spinach, and cooked meat if using.
  • Pour the egg mixture evenly into the muffin cups, filling about ¾ full.
  • Bake for 18–20 minutes or until eggs are set and lightly golden on top.
  • Let cool slightly before removing from the tin. Serve warm or refrigerate for later.

Notes

  • Mix and match fillings like mushrooms, tomatoes, onions, or herbs.
  • These freeze well — reheat in the microwave for a quick breakfast.
  • For dairy-free, omit cheese or use a plant-based alternative.
]]>
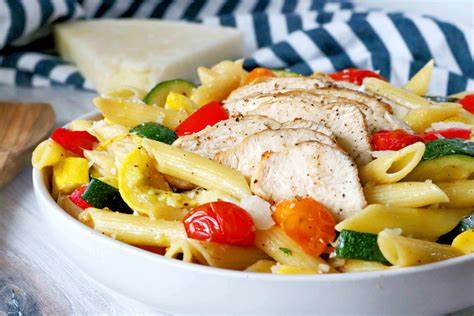
Chef <![CDATA[Chicken Primavera Pasta Bake]]> https://recipewikki.com/?p=7845 2025-06-06T04:55:09Z 2025-06-06T04:54:26Z A vibrant and comforting baked pasta dish loaded with tender chicken and fresh spring vegetables, all coated in a creamy, cheesy sauce. Perfect for a wholesome family meal!

Origin Chicken Primavera Pasta Bake

Primavera means “spring” in Italian, referring to dishes featuring fresh seasonal vegetables. This baked version combines the classic pasta primavera flavors with hearty chicken and melted cheese for a cozy twist.

What I Love About This Recipe

It’s colorful, nutritious, and satisfying — combining lean protein, crisp veggies, and gooey cheese. Plus, it’s a great make-ahead dish for busy nights or feeding a crowd.

Also Read : Creamy Sausage Pasta

Chicken Primavera Pasta Bake

Recipe by RecipeWikki
Servings

4

servings
Prep time

20

minutes
Cooking time

30

minutes
Calories

650

kcal

Ingredients

  • 300 g (10 oz) pasta (penne, rigatoni, or fusilli)

  • 2 cups cooked chicken breast, diced

  • 1 tbsp olive oil

  • 1 cup broccoli florets

  • 1 cup cherry tomatoes, halved

  • 1 cup zucchini, sliced

  • 1 bell pepper, diced

  • 2 cloves garlic, minced

  • 1 cup heavy cream or half-and-half

  • 1 cup shredded mozzarella cheese

  • ½ cup grated Parmesan cheese

  • Salt and pepper, to taste

  • Fresh basil or parsley, chopped (for garnish)

Directions

  • Preheat oven to 375°F (190°C). Cook pasta in salted boiling water until al dente. Drain and set aside.
  • Heat olive oil in a skillet over medium heat. Add garlic and sauté until fragrant. Add broccoli, zucchini, and bell pepper; cook until just tender.
  • In a large mixing bowl, combine cooked pasta, sautéed vegetables, diced chicken, cherry tomatoes, heavy cream, half the mozzarella, and Parmesan. Season with salt and pepper.
  • Transfer mixture into a greased baking dish. Top with remaining mozzarella cheese.
  • Bake for 20–25 minutes until cheese is melted and golden.
  • Garnish with fresh basil or parsley before serving.

Notes

  • Use leftover or rotisserie chicken to save time.
  • Substitute cream with a lighter option like Greek yogurt for a healthier version.
  • Add red pepper flakes for a subtle kick.
]]>
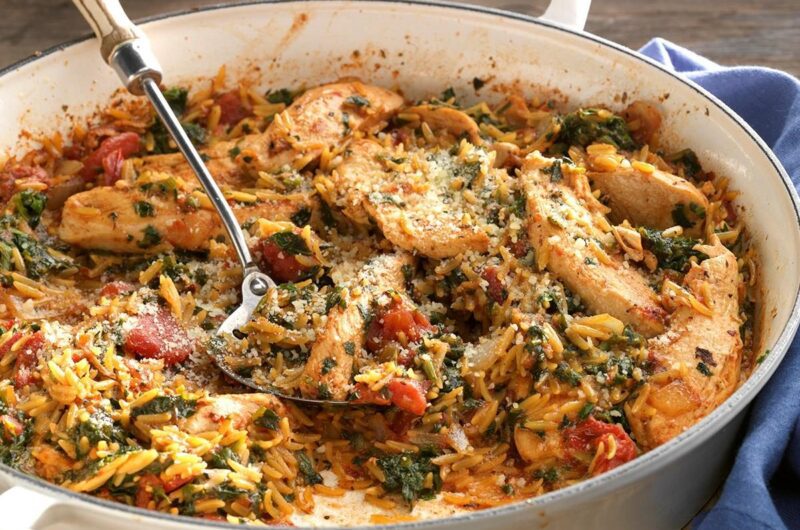
Chef <![CDATA[Chicken Thigh and Orzo Skillet]]> https://recipewikki.com/?p=7833 2025-06-06T04:48:31Z 2025-06-06T03:44:08Z A hearty, one-pan meal combining juicy chicken thighs with tender orzo pasta cooked in a flavorful broth — perfect for an easy yet satisfying dinner.

Origin Chicken Thigh and Orzo Skillet

This dish draws inspiration from Mediterranean and Greek cooking, where orzo pasta and chicken thighs are often combined with fresh herbs and lemon for bright, comforting flavors.

What I Love About This Recipe

It’s simple, packed with flavor, and minimal cleanup. The chicken stays tender and juicy while the orzo soaks up all the savory juices — a true weeknight winner!

Also Read : Japanese Christmas Cake

Chicken Thigh and Orzo Skillet

Recipe by RecipeWikkiCourse: Recipes
Servings

4

servings
Prep time

15

minutes
Cooking time

45

minutes
Calories

648

kcal

Ingredients

  • 4 bone-in, skin-on chicken thighs

  • Salt and pepper, to taste

  • 2 tbsp olive oil

  • 1 small onion, finely chopped

  • 2 cloves garlic, minced

  • 1 cup orzo pasta

  • 2 cups chicken broth

  • 1 lemon (zested and juiced)

  • 1 tsp dried oregano or 1 tbsp fresh oregano, chopped

  • Fresh parsley, chopped (for garnish)

Directions

  • Season chicken thighs with salt and pepper. Heat olive oil in a large skillet over medium-high heat.
  • Add chicken, skin side down, and sear until golden and crispy, about 5–7 minutes. Flip and cook 3 minutes on the other side. Remove chicken and set aside.
  • In the same skillet, add onion and garlic; sauté until softened and fragrant.
  • Stir in orzo and toast lightly for 1–2 minutes.
  • Pour in chicken broth, lemon zest, and oregano; stir to combine.
  • Nestle chicken thighs back into the skillet, skin side up. Reduce heat to low, cover, and simmer for 15–20 minutes until orzo is tender and chicken is cooked through (internal temp 165°F/74°C).
  • Remove lid, squeeze lemon juice over, and garnish with fresh parsley. Serve hot.

Notes

  • For extra flavor, add a splash of white wine when deglazing the pan.
  • Swap orzo for other small pasta like acini di pepe or couscous if preferred.
  • Leftovers reheat well and make a great next-day lunch.
]]>
Chef <![CDATA[Crab Rangoon Casserole]]> https://recipewikki.com/?p=7827 2025-06-06T03:38:15Z 2025-06-06T03:38:00Z All the creamy, crispy magic of classic crab rangoon — but baked into a warm, cheesy, crowd-pleasing casserole. It’s the perfect fusion of comfort food and takeout favorite.

Origin Crab Rangoon Casserole

Inspired by the beloved American-Chinese appetizer, this casserole captures the essence of crab rangoon (typically fried wontons stuffed with crab and cream cheese) in an easy-to-bake dish ideal for parties or weeknight dinners.

What I Love About This Recipe

It’s indulgent, flavorful, and incredibly simple to throw together. You get all the gooey, savory goodness of crab rangoon with way less effort — and no deep-frying!

Also Read : Chicken Teriyaki

Crab Rangoon Casserole

Recipe by RecipeWikki
Servings

4

servings
Prep time

15

minutes
Cooking time

40

minutes
Calories

570

kcal

Ingredients

  • 8 oz (225 g) cream cheese, softened

  • ½ cup sour cream

  • 1 tbsp mayonnaise

  • 1½ cups cooked crab meat (real or imitation), flaked

  • 2 green onions, sliced

  • 1 clove garlic, minced

  • 1 tbsp soy sauce

  • 1 tsp Worcestershire sauce

  • 1 tsp sugar

  • ½ tsp black pepper

  • 1 cup shredded mozzarella cheese (plus extra for topping)

  • 2 cups crushed wonton chips or tortilla chips (for topping)

Directions

  • Preheat oven to 375°F (190°C). Lightly grease a baking dish.
  • In a large bowl, mix cream cheese, sour cream, and mayo until smooth.
  • Stir in crab meat, green onions, garlic, soy sauce, Worcestershire sauce, sugar, pepper, and mozzarella cheese.
  • Transfer mixture into the baking dish and spread evenly.
  • Top with a generous layer of crushed wonton or tortilla chips and a handful of extra cheese.
  • Bake for 20–25 minutes, until bubbly and golden on top.
  • Serve hot with more chips or toasted baguette slices.

Notes

  • Add a dash of sriracha or chili flakes for a spicy version.

  • For a more authentic crab rangoon flavor, sprinkle in a few drops of sesame oil.
  • Leftovers reheat well — even better the next day!
]]>
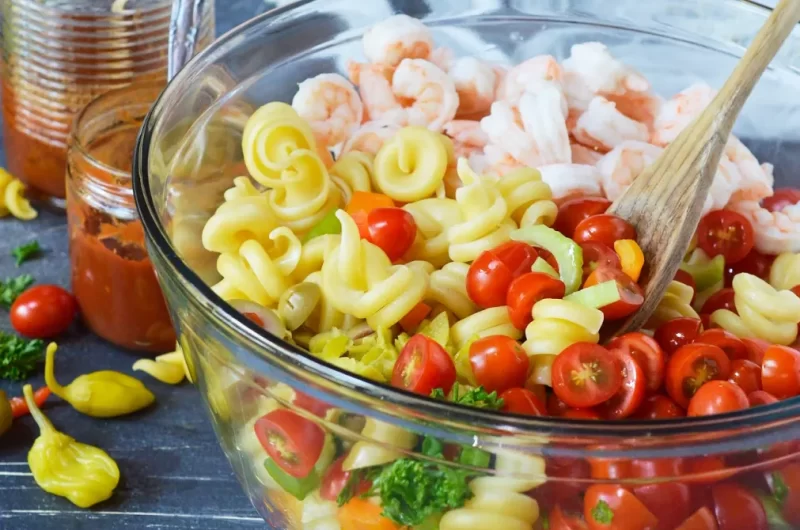
Chef <![CDATA[Bloody Mary Pasta Salad]]> https://recipewikki.com/?p=7821 2025-06-06T03:33:56Z 2025-06-06T03:33:47Z A bold and zesty twist on traditional pasta salad — this Bloody Mary-inspired version is packed with punchy flavors like tomato, celery, olives, and a hint of hot sauce, perfect for brunch or summer cookouts.

Origin Bloody Mary Pasta Salad

Inspired by the classic Bloody Mary cocktail, this pasta salad mimics the same savory-spicy flavor profile, transforming it into a unique and refreshing dish with a satisfying bite.

What I Love About This Recipe

It’s unexpected, flavorful, and super fun! It’s like having your favorite brunch cocktail — but in pasta salad form. Ideal for BBQs, picnics, or a brunch spread with a twist.

Also Read : Beef Miso Ramen

Bloody Mary Pasta Salad

Recipe by RecipeWikki
Servings

4

servings
Prep time

30

minutes
Cooking time

40

minutes
Calories

221

kcal

Ingredients

  • ½ cup tomato juice (or V8)

  • 3 tbsp olive oil

  • 1 tbsp lemon juice

  • 1 tbsp Worcestershire sauce

  • 1 tsp hot sauce (or to taste)

  • ½ tsp celery salt

  • ½ tsp black pepper

  • Optional: a splash of vodka for a grown-up versio

Directions

  • Cook pasta according to package instructions. Drain, rinse with cold water, and set aside.
  • In a large bowl, combine cooked pasta, tomatoes, celery, pickles, olives, red onion, and parsley.
  • In a small bowl or jar, whisk together all dressing ingredients until well combined.
  • Pour dressing over the salad and toss to coat evenly.
  • Chill in the refrigerator for at least 1 hour to let flavors meld.
  • Serve cold, garnished with extra parsley or celery stalks if desired.

Notes

  • Adjust hot sauce and Worcestershire to your taste.
  • Make it a meal by adding cooked shrimp, grilled chicken, or hard-boiled eggs.
  • Keeps well in the fridge for 2–3 days — great for meal prep!
]]>